Recently i did some mastering for the almighty CTRLS (Token Records/Animal Farm), i took this opportunity to ask him if he would like to share one technique that helps define his sound, and here’s what he had to say

Parallel Crunch Compression – Ctrls style
The following text might not make a lot of sense to you if you’ve never used a compressor or don’t have a pretty solid understanding of how they work. However, to keep focus, I won’t be going into detail about the basics of compression here. Also note that I’m coming from a strictly software standpoint and setup. So it wouldn’t hurt to have a basic grasp of phase issues and Plugin Delay Compensation either. All the compressors I mention are plugins, but I’m sure it’s applicable to lots of hardware, I’ve just not tried it myself. And I’m definitely not claiming I’ve invented anything, or done anything unique here. This is just my fairly unscientific, and very personal, take on an old concept. With all of that out of the way, let’s dive in.
The Concept
Like everyone else, I had no clue how to use compression when I first started. I think it’d be accurate to say that I went in and out of phases of understanding the traditional way of applying it for a while. I think it’s important to understand that electronic musicians like me, strictly speaking, don’t need them at all these days. Most of us have barely recorded anything in our lives, and we don’t have to worry as much, or at all, about the noisefloors of yesteryear. I kept finding myself asking questions like, “It’s really just an envelope follower, right? What’s the big deal?” And it seemed to me like they were harder to set up than my samplers and synths too. I had even totally given up on them at one point, but people kept romanticizing them so I kept experimenting. And during all the trial and error and messing around with concepts like parallel and ‘New York’ style compression, I came on a setting that’s about as ‘wrong’ as possible, but has become a fundamental part of my mixing and has influenced my production and writing a lot too.
What I happened on is fairly simple: you set up the compressor to be as fast as possible with a relatively high ratio. If you know your gear, you can probably guess what will happen: It’s pretty much a guarantee that it’ll fail at keeping signal and transient integrity on anything its working on. You basically get a sort of transient aware distortion (or if you like, a really bad limiter) and flattening that, with the right compressor, can be surprisingly musical and organic when you blend it with your original sound. On insert too, should you like things rough.
So why am I so excited about this technique? Because being able to push against a dynamic ceiling like that, and not have the result be completely flatlined and unmusical, is what legendary outboard gear like the good tape machines do really well. And it’s something the culture of limiters and plugin distortion has made increasingly rare. It can also be used as a kind of crosstalk, like you get in classic mixers, and you get the groove and musical interaction of the compressor on top of all that. I’ve wanted to fuse that part of the analog domain with the workflow of the digital for a while now, and it feels like I did it. I’m not claiming this will make your mixes sound ‘Neve’-like or whatever, but you can use some of the benefits of that world to your advantage – great advantage, as it turns out.
Setting it up
There are a lot of ways of doing parallel compression, but for this, I would recommend using a basic send/return setup. You’ll need to comfortably be able to balance several sounds through one or more compressors to get the full benefit of this technique.
The basic formula:
1. Insert compressor on a return/aux/send.
2. Fastest possible attack and release.
3. High ratio, usually not infinite/straight limiting, but close to it.
4. Feed drums or lead synth to the return.
5. Lower threshold and adjust make up the gain and release to taste. Do not solo the send while adjusting.
6. Feed some more sounds and instruments to the send, adjust the threshold further.
7. EQ/saturate before/after compressor – again, no soloing!
Plugins
There’s only really one requirement for the compressor to be able to do this. You need fast attack times, something approaching limiter/lookahead fast at least. If not, the compressor will likely start pumping or clicking irregularly, and won’t be much good for what we’re trying to do. Faithful analog emulation can be a plus too, it’s also a good way of testing how realistic the developer’s circuit modelling is. Of course, this doesn’t necessarily mean that every compressor with these features will sound good doing this. But it’s something I always try when I get my hands on a new one, and I’m often pleasantly surprised.
As luck would have it, two of my favourite compressor plugins for this technique happen to be free, so I’ll go through how to setup them up to achieve the effect I’m looking for. I’ve also included one of my favourite commercial compressors for more advanced techniques.
VladG Molot Compressor – Organic Destruction
The plugin that I discovered this technique with, and probably the one with the most musical attack and release curves in my collection. The main parameter to be aware of when you do this technique with Vlad’s great compressor is the two different modes. Sigma tends to pop a lot more, and the alpha mode completely breaks the signal and gives you a really cool ‘dynamic’ distortion that I love for adding an organic feel to, well, everything. Should things get too crunchy for you, making the release a bit slower will tame the worst of it.

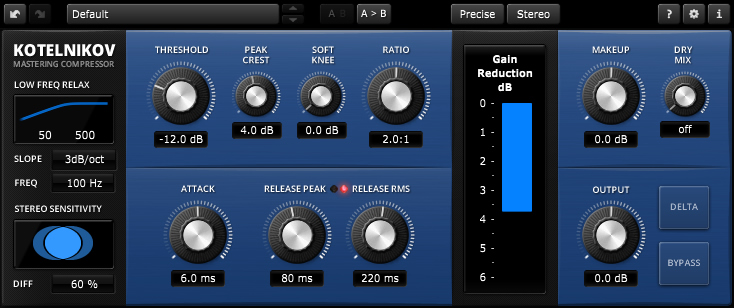
TDR Kotelnikov – Transparency and Flexibility
When set up as described above, Kotelnikov still flattens transients like Molot’s alpha mode, but stays closer to the original sound. The ‘Crest Factor’ parameter will be a kind of aggression control (making it a straight compressor at 0, over it’s usual feedback topology) and will yield various degrees of crunch once a signal hits the threshold. This thing is really properly deep, and has such a detailed response that you can push it to do a bunch of different characters. Everything from crunchy and dense to flabby and soft, and I’ve not even tried the commercial version yet.
Elysia Mpressor – Gain Reduction Limiting
My latest favourite for this technique is the Mpressor, and while it’s not free you definitely get a lot for your money. It’s one of the most fun and versatile compressors I know for parallel, and it’s like it was made for this technique: Limiter-like fast attack, and really snappy and aggressive response in general, strange negative ratios for odd pumping action, a very nice tilt filter to control harshness and warmth, and great sounding saturation with the makeup gain to soften and fuzz things up even more. But my favourite feature is the gain reduction limiter, because you can Hulk smash stuff and still retain the degree of punch/definition you want. And like Kotelnikov, it’s just nice to have a more modern-sounding way to bust things up.
Things to watch out for
1. This stuff can get confusing fast, and you don’t want to make the mixing process harder for yourself. The aim for me is usually the exact opposite. Don’t try and let it carry the whole mix at first, just have it add to it. Obviously there’s a time to have fun and go nuts, but keep it simple while you’re learning. Start with 1 or 2 compressor sends, for a good 3-4 finished mixes at least. Then expand into more and get a handle on the increased complexity.
2. This isn’t a completely safe technique. You can still squash your mix into lifelessness or make it overly harsh, even though it’s a little harder. Mix those compressor returns in too loud and everything will be pushed to the front. You risk missing out on a lot of definition and the elusive 3D feel. So respect the dynamics and spread the load across the compressors.
3. The compressors will only be able to handle so much information at a time, so you need to have some kind of idea of what levels you’re feeding them, and what you want them to grab on to. Get too reckless, and make them work too often, and they’ll start pumping and make your track feel unstable, instead of adding density and power. Feed the compressors spiky percussion, or sounds with too harsh a click, and they might choke in a way that doesn’t suit your track. Keep in mind that not everything has to go to the compressor sends, and that certain compressors might deal with specific sounds better then others.
4. Pay less attention to your channel meters. It’s gonna be much harder to judge the precise level since the sends will be added in, and that’s probably a good thing! Most people mix too much with their eyes anyway. So just pay attention to the master channel, and keep lots of headroom.
5. Be mindful of phasing problems. If you’ve got a single compressor and EQ on each send, then most modern DAWs should be able to deal with it. Older setups with no PDC will make it very hard to execute if you’re using oversampling plugins, and I am, in this example.
6. I’m not sure everyone will agree with me on this, but here goes: Try to stay away from high pass and lowpass filters if you’re EQing the return, especially after the compression. Unless you’re going for a particular effect (audible resonance or so) I’d recommend trying to fix the problem at the source instead. It just sounds a bit weird, and not as full in my experience, and phase issues should always be a concern when using filters.
7. I wasn’t kidding about the solo button. That goes double for your instrument channels. Use it as little as possible. Parallel processing is all about context, and you’re likely to miss a ton of sweet spot settings if you remove yourself from that context. In general, I’d say: Be aware of your overall gain structure, use good sources, and you’ll barely need to solo. You’ll probably mix faster too. (In case you’re onto me: Yes, I’m partially telling off myself here… old habits really do die hard!)
Reasons I love this technique
1. You will learn your compressors in depth in a way you probably didn’t expect. Particularly on the musical side, there’s a lot of fun groove and pumping to be added in. And on the technical side, there are some kinda unique textures and colours you can mess with.
2. The transients get so distorted that you can add them back in to your sound without much risk of phasing, and it tends to keep drums nice and firm while still adding dirt and warmth.
3. It’s what I always recommend when people ask me how to do the the really distorted near-gabber techno sound (MPIA3/Truss, Joe Farr, J.Tijn, Andy Stott, and so on) that’s been going around as of late, but want to keep the punch and some kind of definition and depth. There are some great distortion plugins and clipper-like solutions available. But most of them completely flatten the sound and even in parallel it often ends up too flat and square-sounding for me. Molot and the Mpressor being hit hard on sends with a fairly high ratio can give you the same type of texture but at the same time make it simpler to retain some dynamics. In my (very humble) opinion, it’s much easier and more musical than trying to rescue punch from a distorted mess. And I love a distorted mess almost as much as I love punch and definition. Also, I’ll hazard a guess that your mastering engineer will appreciate you not sending them a clipped or limited file because ‘that’s your sound’.
4. The tune can almost mix itself if you get a good blend going into your sends and use compressors that compliment each other (like Kotelnikov and Molot). For example: I don’t really use sidechaining any more after getting used to this technique. If I want things to get out of the way of my drums I just send more of the drums to the compressor, then the other sounds. As a result, everything else will get squashed by the drums, with interesting artefacts added around them, which yields a more natural feeling than most sidechaining I’ve heard. Especially for aggressive sounding dance music. If you want more inspiration for this kind of thing, look up a concept called Multi Bus Compression.
5. It’s a really easy way to make your tunes LOUD and assertive without having to get into DIY mastering or being super anal about catching a dB everywhere you can in the mix. Because you’re smashing the transients, and adding everything back in you get something approaching upwards compression but with the added ‘vibe’ of your compressor failing gloriously.
6. It makes your DAW feel less static and more like an analog mixer. And it’s a much more CPU friendly approach than most console emulations. Getting a nice DAW controller or MIDI controller can add to the intuitive feel even more. Again, if you want to go even deeper along those lines, I’d suggest looking into Multi Bus Compression (as refined by Michael Brauer), also known as matrix stem mixing. There’s a lot of inspiration to be had by looking at, and trying out for yourself if you can, how outboard mixers make for a more musical mixing experience and how you can transfer that to a solution that makes sense to run off a computer.
Happy crunching! -Ctrls